Five Most Important Home Maintenance Tasks Every Home Owner Should Do Regularly
 Anna Wenner
Whether you're a new homeowner or just want to make sure you're focusing your efforts where it counts most, these five tasks are the place to start when taking care of your home. Remember—a little home maintenance can save a lot of time, stress, and money down the road.
In an ideal world, we would all regularly do every possible form of maintenance to keep our home at its best. However, we live in the real world, where for many of us, time is short and money is tight. Sometimes, there just aren’t enough hours in the day to get to everything—and you know what? That’s absolutely okay.
The thing about home maintenance is that it’s a marathon, not a sprint. Every little bit helps.
Regular maintenance can help your home be safer, run more efficiently, and avoid huge expenses down the line. Though all maintenance is good maintenance, there are some tasks that you absolutely shouldn’t put off.
I like to think of it as my “would my super handy uncle roll his eyes if he found out I hadn’t done this?” list. (Or, more accurately, perhaps, “Would my super handy uncle insist on doing it together the second he found out that I’ve put it off?”)
Basically, if you need a place to start, or just want to check that you’ve got the most vital stuff covered, this list is for you.
1. Replace your HVAC filter
Your HVAC air filter helps keep dirt, dust, pet hair, dander, and other unpleasant particles from circulating around your home. It can help with poor air quality days from pollution or fires and helps the unit run efficiently.
Forgetting to change the filter doesn’t just lead to worse air in your home—it can cause health complications, high energy bills, poor temperature regulation, and can even lead to your system breaking down.
Figure out how often your air filter needs to be replaced
You’ll hear from many that an HVAC filter should be changed anywhere from every 6 weeks to 6 months. However, every home has different needs.
To figure out how often your filter should be replaced, consider your lifestyle and the thickness of your filter. Thicker filters can be replaced less often, for instance, but additions like pets can increase how often your filter needs to be changed.
When you buy your filter, its packaging should say how often you need to replace it. It’s best to follow these guidelines as much as possible. That said, if you already tossed the packaging material ages ago, there are other ways to figure out the frequency of replacement that you need.
Though this is by no means an exhaustive or definitive list of replacement suggestions, if you’re after an at-a-glance gut check on when your filter needs replaced, try following this:
- 1 Month: If you have a lot of pets (or humans, for that matter) in the home or anyone with seasonal or other airborne allergies, you probably want to err on the cautious side by changing the filter more frequently. If you buy very thin or especially cheap filters, it’s also a good idea to change them more often.
- 3 Months / Per Season: One easy way to remember to change the filter is to do it as part of your seasonal chores. Putting up the garden hose for the winter? Throw in a new HVAC filter while you’re at it. This also helps get rid of any allergens from the previous season that might be trapped in the filter and stop them from continuing to circulate through your home.
- 6 to 12 Months: If you keep your home regularly cleaned, don’t have pets, use devices like room air filtration systems, and install a thicker filter, you may not need to replace as often. Even so, twelve months is the maximum most experts recommend.
By starting with the suggestions above, you should have a pretty good idea of where to start. However, if you want to check if you’re at the right frequency, it’s easy to do so.
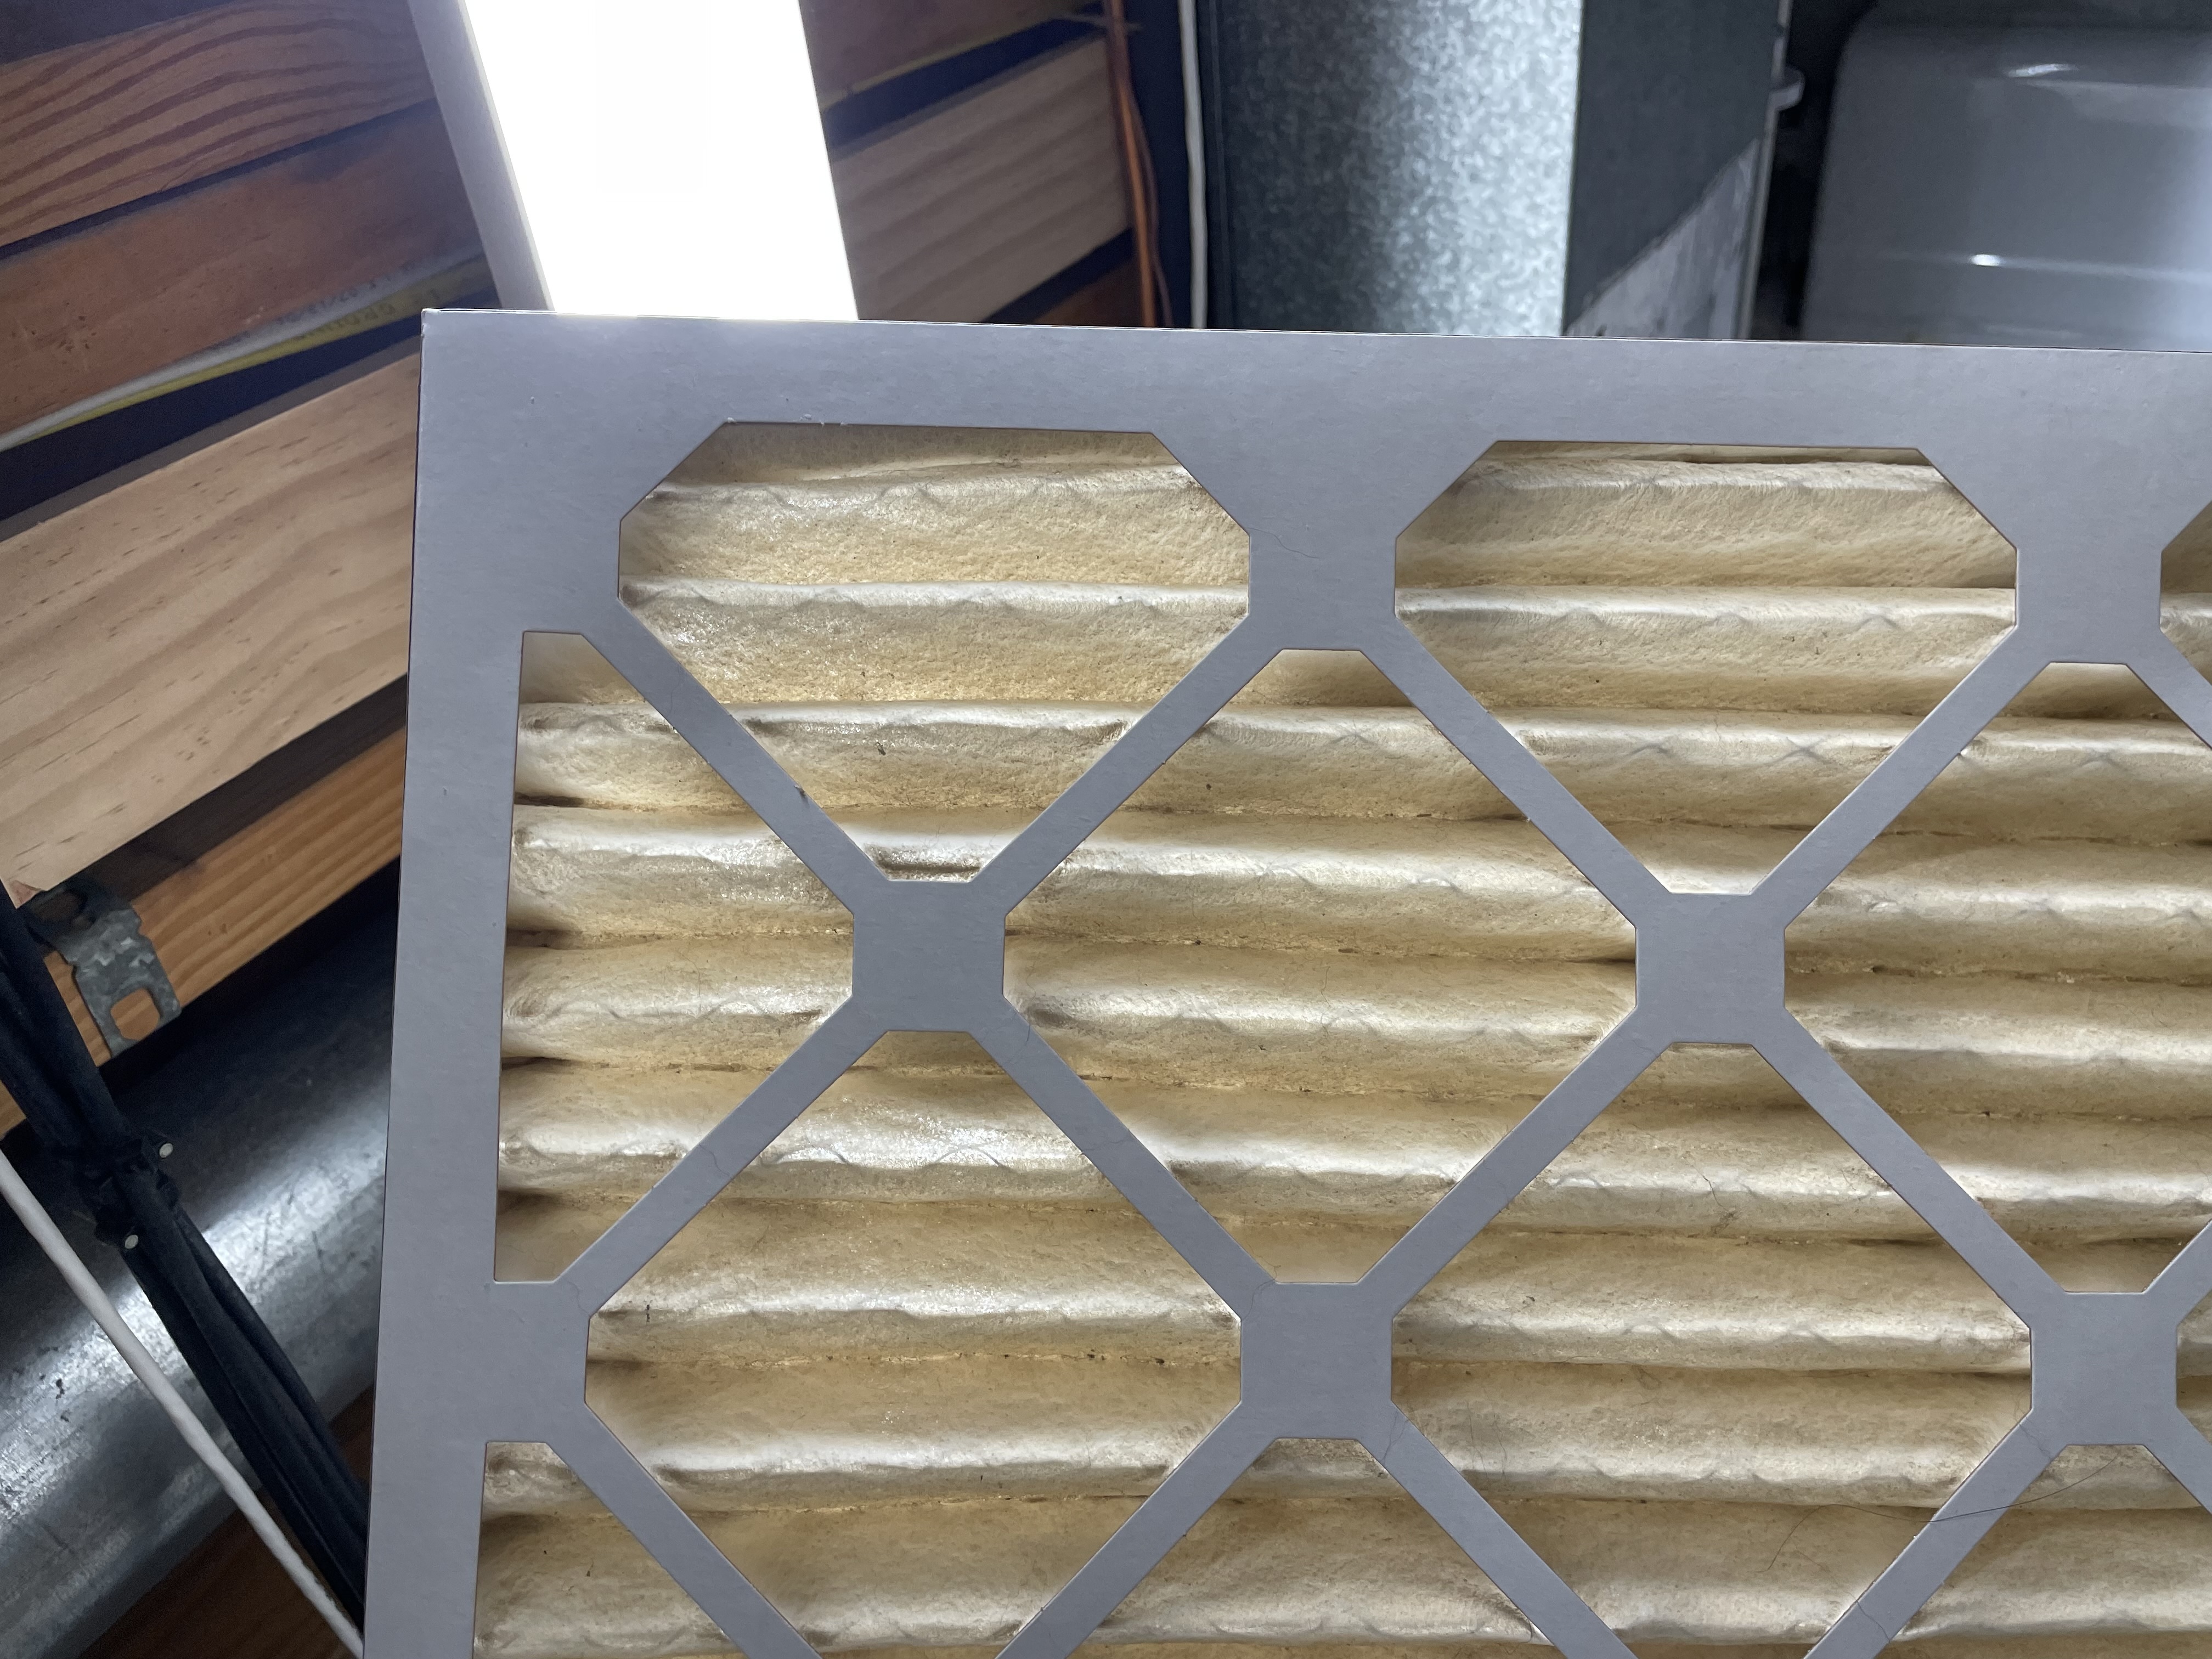
Next time that you go to change the filter, hold the used filter up to the light. If it’s still mostly translucent (light passes through), then you have some more use out of it. On the other hand, if little to no light passes through, it’s time for a new one. (And if there are a litter of dust bunnies falling off of it, it’s definitely past time.)
In these cases, you might try shortening your schedule a bit at a time until you find the right balance of a filter that is ready to be changed but not staying dirty too long.
Determine the filter you need
Size
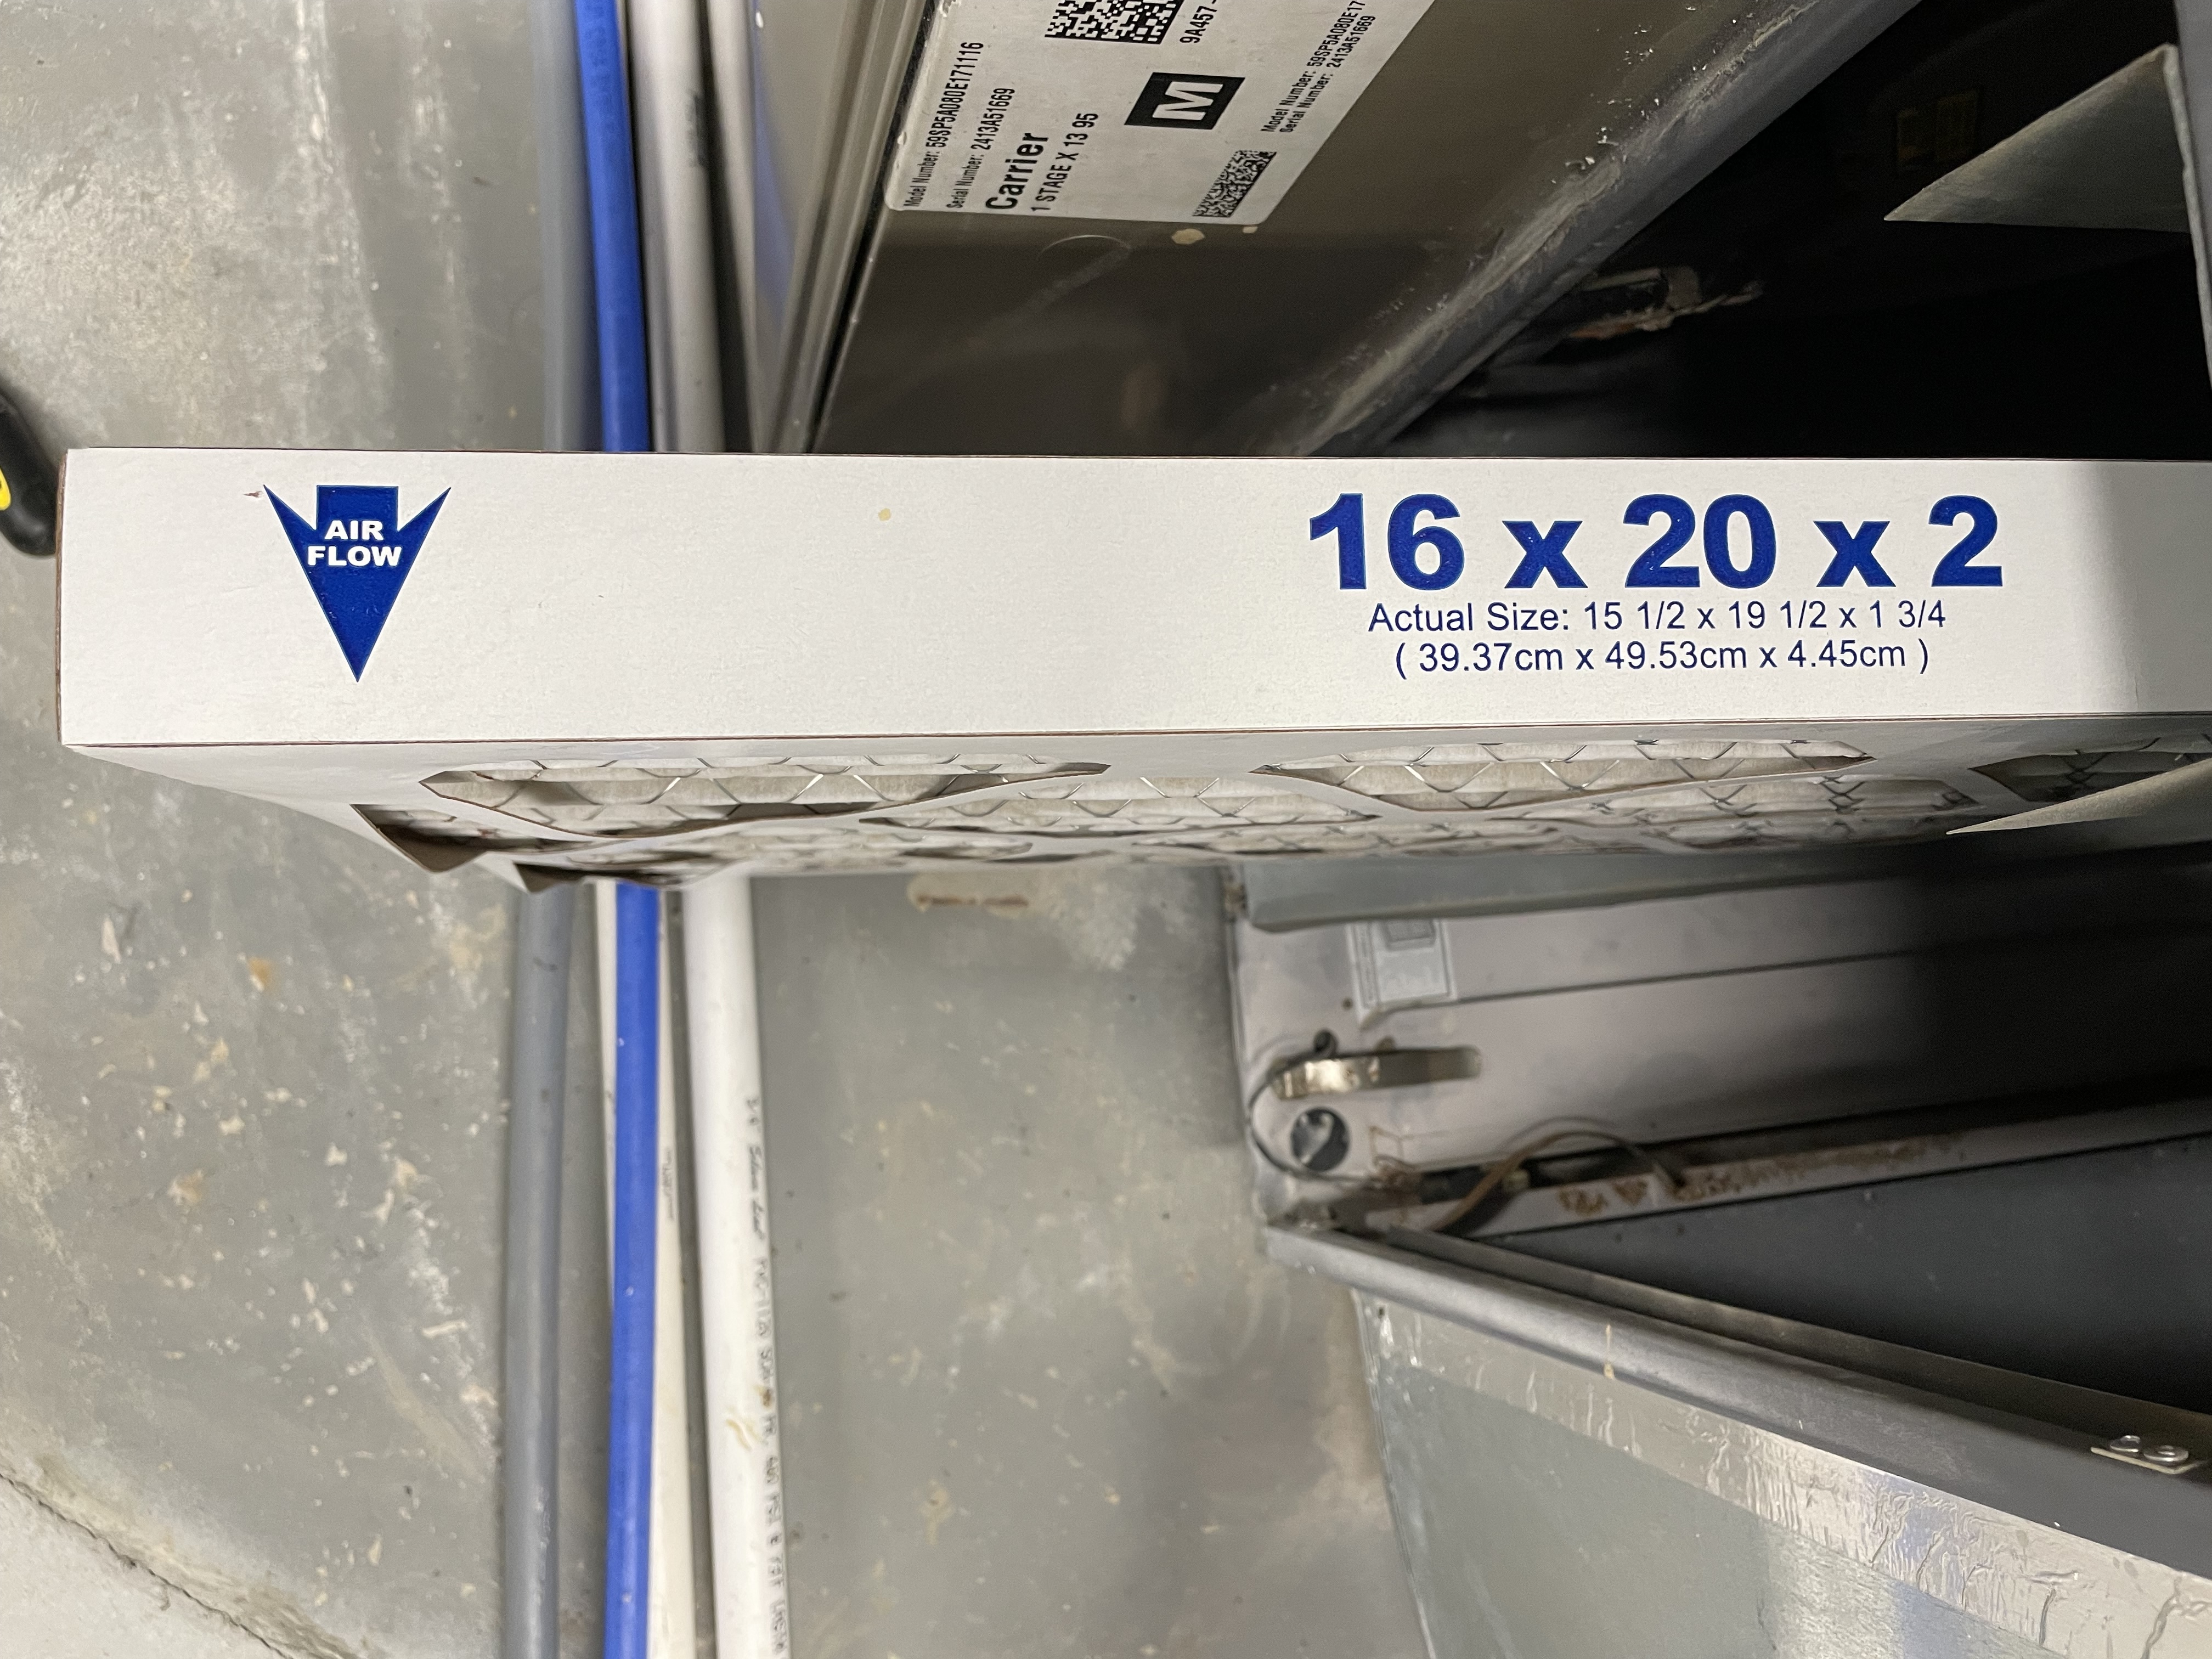
The filter currently in your HVAC should have some information listed along its edge, such as its size. The filter should fit snugly within its slot, so if there is extra space, measure the space rather than replacing the existing filter with one of the same size. Be sure to measure all three dimensions (length, width, and depth) and buy a replacement as close in size as possible.
Brand
There are a lot of filter brands out there to choose from. While a brand name isn’t required for a quality product, Filtrete is one that regularly tops “best of” lists. Other brands that are talked about highly include Filter King, Aprilaire, Lennox, Carrier, and Woosh.
Minimum Efficiency Reporting Value (MERV) Ratings
The MERV rating is basically your way of knowing how well an HVAC filter removes particles from the air. (It’s similar, though not the same, as a HEPA rating, if that helps.) It’s essentially measuring how good the net is for catching the bad stuff before it gets back into your air circulation. A higher number means a smaller opening for air and particles to go through, which can be good for filtering but can also put unnecessary pressure on your system’s airflow. Because of this, while a higher number may mean better filtering, it doesn’t necessarily mean it’s the best option overall.
Wirecutter recommends choosing a filter with a MERV 13 rating when possible. This should be low enough to not put extra pressure on older systems while also filtering the air thoroughly even under a lot of heavy use (such as in wildfire-prone areas).
If you have a really ancient system, or it’s on its last leg, you might want to opt for a MERV 8 just to be on the safe side. The lower the number, the less resistance as it pulls in air and the less hard your HVAC system has to work.
(As a note, you may also see MERP or FPR ratings, which are basically a similar system developed by specific stores. The same rule applies here though—a higher number means better filtration, but also more potential strain on your HVAC unit.)
Buy replacement filters
You can purchase air filters at most hardware stores and online venues such as Lowes, Home Depot, or Amazon. Buying in bulk will be cheaper, especially if you plan to have them shipped.
Both Wirecutter and Consumer Reports rated the Filtrete MERV 13 MPR 1900 air filter as the best you can buy, so if you’re looking for a (mostly) sure thing, that’s where we’d start.
You should always buy the size of air filter that fits into the slot in your AC unit, including the depth. While 1” and 2” filters are the most common, that doesn’t necessarily mean that’s what you have.
For example, when I moved into my house, it had a 2” deep filter in place but a 4” opening. I fixed that by replacing it with a 4” filter when it was time for a new one. Personally, I got the same type recommended above, just with the 4” depth instead.
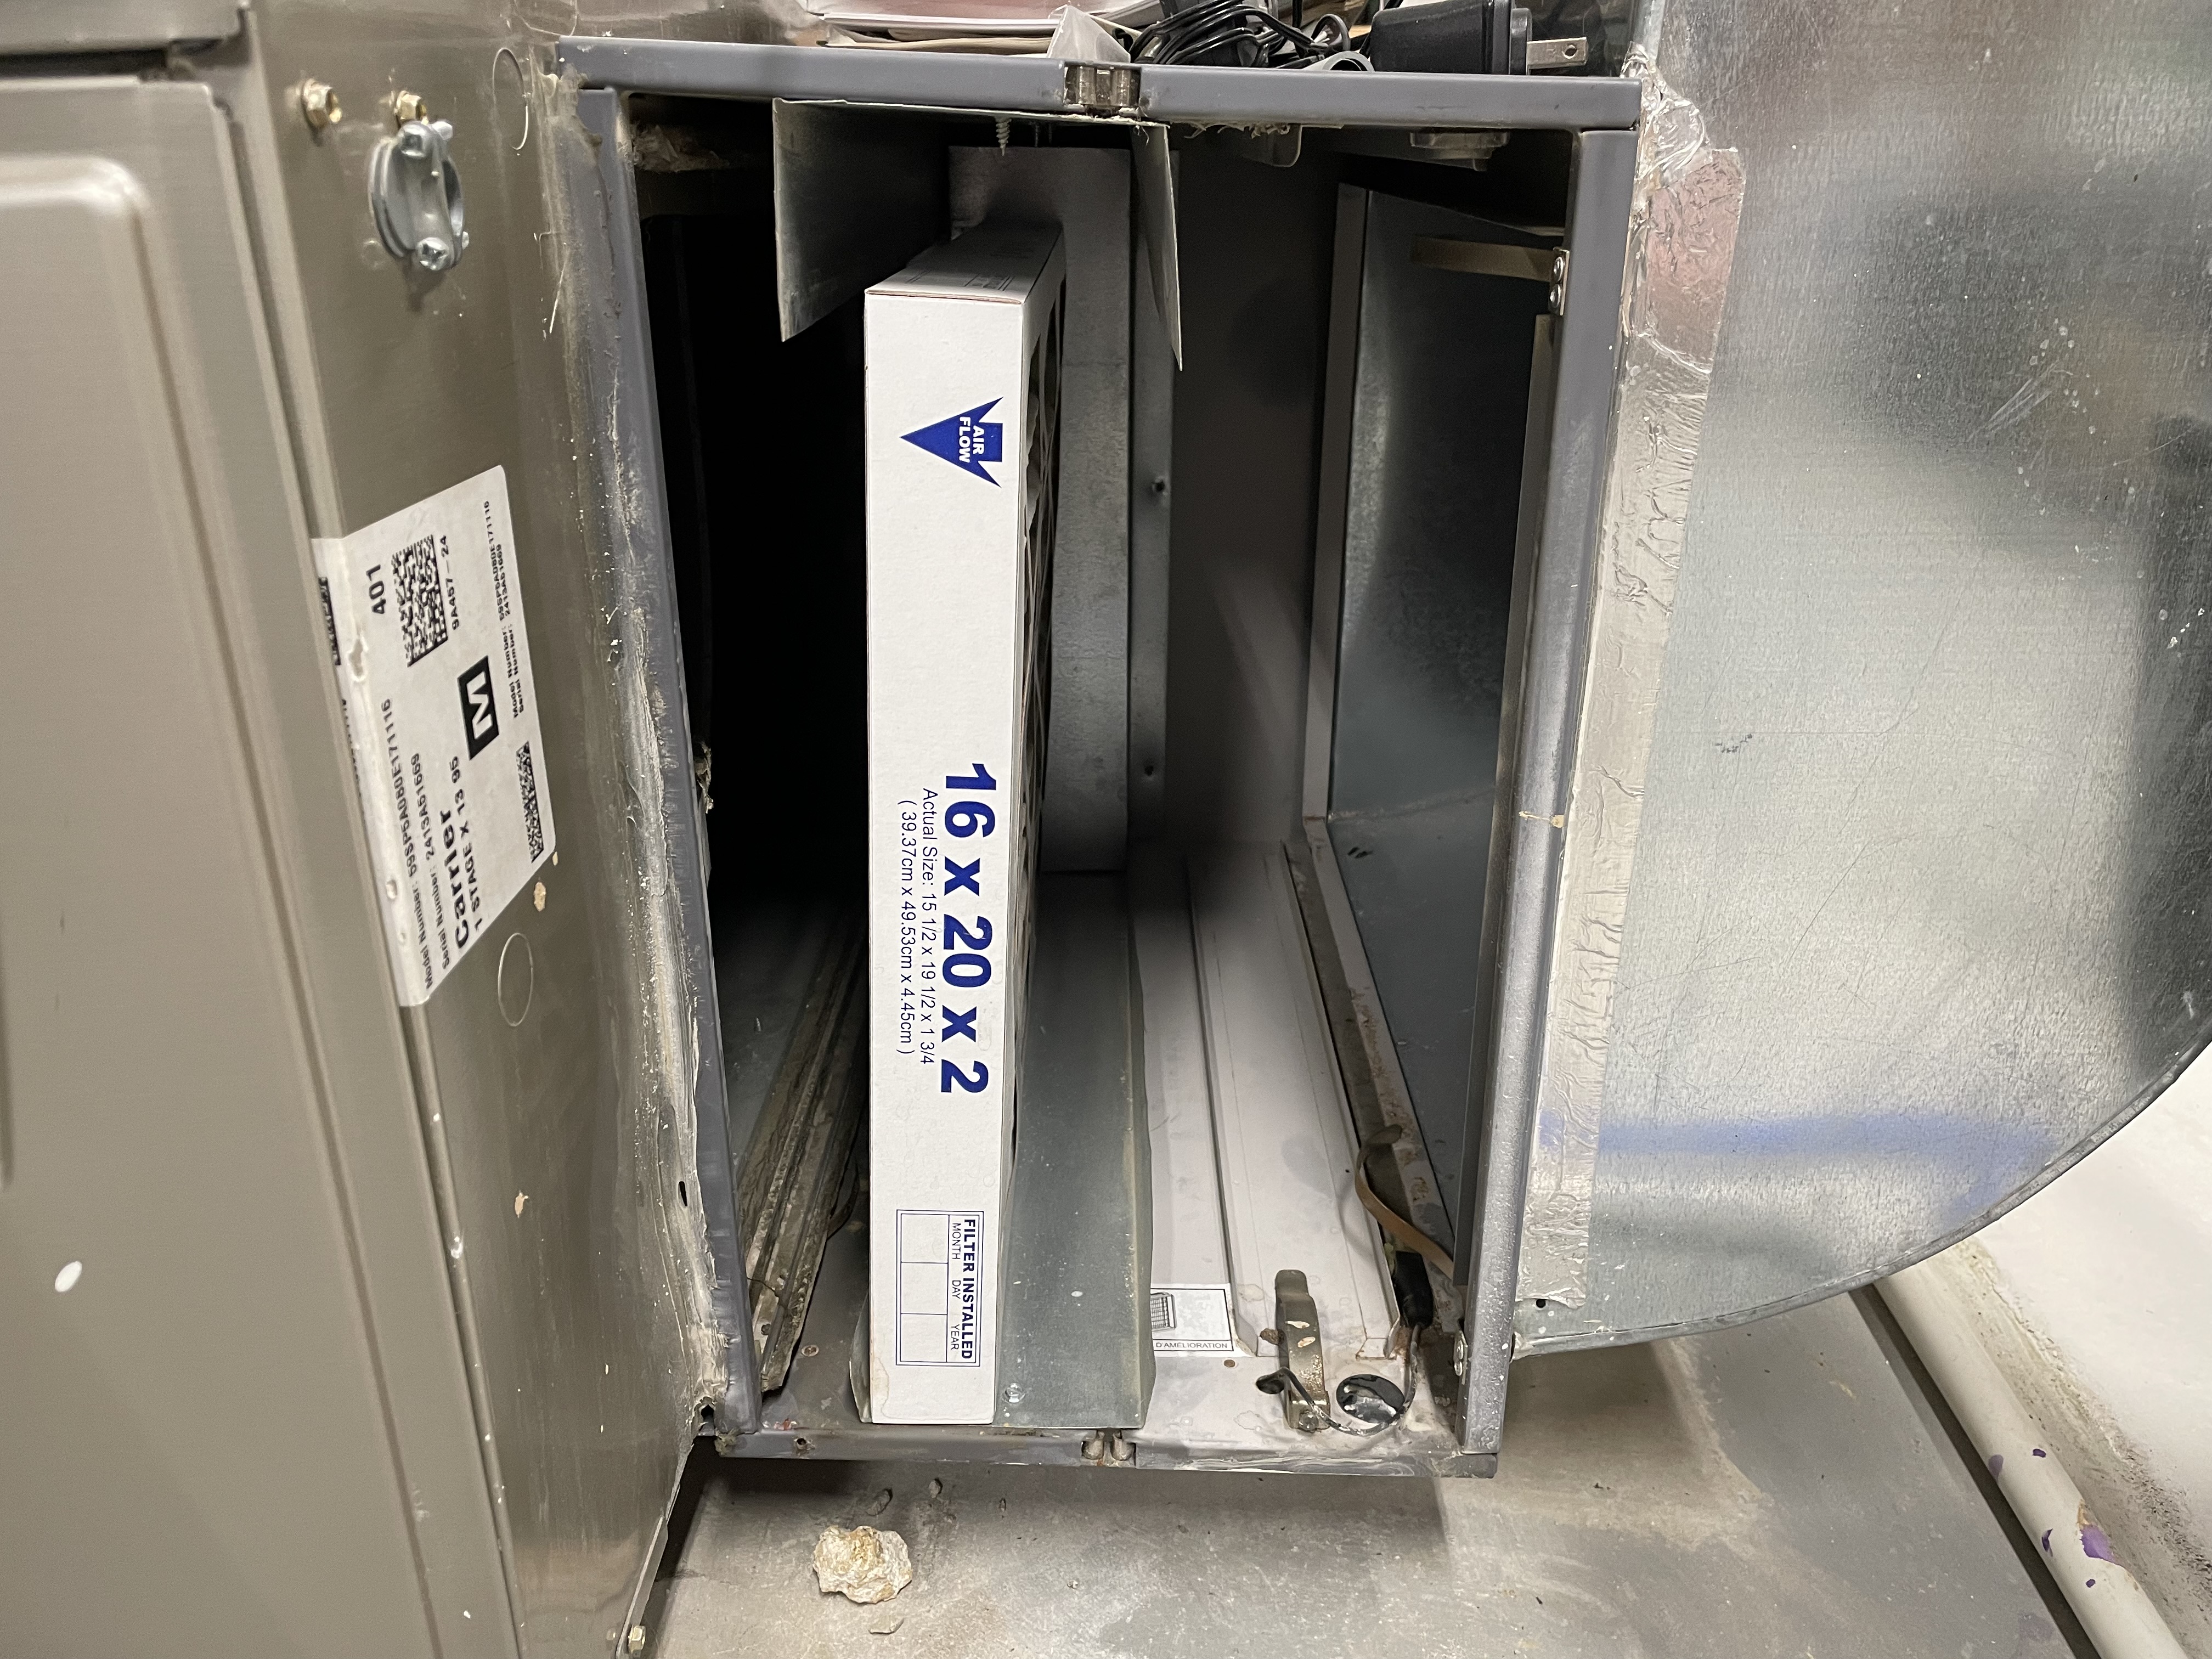
Remove and dispose of old filter
Slide out the old filter. Some units might have a panel to remove first, while others provide immediate access. Used filters can be disposed of with regular home garbage.
Typically, you will be disposing of the filter itself as well as the paper or plastic frame holding it. However, some filters are reusable and should instead be washed, dried, and returned to the HVAC unit.
A good rule of thumb is that if the whole thing seems to be made of paper and cardboard, you can toss it all and replace it. If it’s made of sturdier plastic or metal, you may want to look up the brand to see if it’s meant to be cleaned rather than buying all new filters. It can save you a decent amount of money down the line.
When getting rid of an old filter, we recommend putting it into a garbage bag to avoid tracking dust, debris, and other particles through your home. You can also check your local trash collection guidelines to see if there are any specific steps you need to follow.
Put in the new filter
Remove any plastic or packaging from the filter. (It may seem obvious, but you’d be surprised how often people miss this step.)
Then, install it as the arrow on the filter (located on the thinnest sides of the filter) indicates, aligned with where the air is coming and where it’s going.
2. Check your gutters are clean and in good shape
Clean and well-maintained gutters are one of the best ways to prevent water damage from storms. When gutters work the way that they are meant to, they help keep large amounts of water from dumping off of the roof and straight onto your foundation.
Storms can damage gutters or clog them with leaves, seed pods, and more.
Ideally, you should always do a quick visual inspection of your gutters after a storm, even if it's just looking up at them from the ground for any sign of broken areas or noticeably piling up debris.
If you want less hassle around your gutters, gutter guards can be a great investment. They function essentially as a sort of grate laying flat over your gutter, making it easy for water to get in but not much else. That said, these can also get covered with a layer of leaves, pods, and other tree debris, so you’ll still want to follow the below steps periodically to make sure nothing is interfering with the guards.
Check if your gutters need some attention
If it’s been a minute since you last cleaned out your gutters (or you can’t remember when the last time was), you may not need a ladder for this step. If you can see anything above the edge of your gutters—whether sitting on gutter guards or piled in the gutter itself—then you’ll need to clean your gutters.
And if you can see a plant growing in there? Well, let’s just say it’s a little over time. (But hey, it’s happened to us, too.)
Similarly, if you watch your gutters during a heavy rain, you can usually tell where a clog is by how the water runs. If it’s spilling over the side of the gutter anywhere that it shouldn’t, that’s a sign that there’s probably something blocking the water flow.
If you see water pouring out of the gutter anywhere it shouldn’t—but not spilling over the sides—then you may have a hole in the gutter in that area. You should never deal with either of these problems while it’s still raining, but take pictures and notes of where the problem is so you remember when the weather is nicer.
Depending on the height and steepness of your roof, sometimes it's easiest to stand on a ladder to perform an assessment of your gutters’ condition while other times it may be easier to sit or stand on the roof itself.
Whichever you do, always have a second person there to hold the ladder and keep an eye out for safety concerns from the ground. Never attempt this when it’s raining, snowing, or any other form of precipitation is likely or when you’re starting out especially tired, as it can increase your risks of falling.
While at gutter height, you can look at the interior of your gutters. Ideally, you'll find a clean pipe from one end of the roof to the other. More likely, you'll find leaves, seed pods, and other debris from trees. If you have gutter guards (mesh that sits on top of the gutters to prevent buildup), you'll still want to check to make sure that the guards themselves aren't clogged with debris. You can often see clogs of this nature from the ground, however.
If you want to avoid a ladder but also don’t see signs that your gutters for sure need a good clean, you can base your assessment off time. Gutters should be cleaned every six months at minimum (more for places with a lot of trees or other outdoor debris like seed pods).
If you plan to hire someone to do this for you, make sure to have them check that there is no wear, holes, or other issues with the gutter beyond any buildup.
Clean your gutters (if needed)
If your gutters have some clogs, it's time to get them clean. You can do this yourself for free, or can hire a professional if you're not the most comfortable with heights. You should not attempt to stand or sit on any particularly steep roofs, though you can still often clean these gutters from a ladder safely.
(You can tell your roof is steep either by comparing it to surrounding homes. You will also notice immediately if you ever do try to get on the roof, as even a slight shift in angle can lead to vertigo and a higher chance of sliding off. On the flip side, a gently sloping roof will be easy to move around on for anyone not scared of heights.)
If you have particularly high roof lines, we recommend hiring a professional. You’ll need a much taller ladder for many of these homes, and this can increase the danger of any mistakes.
Regardless of your gutter heights, if you’re using a ladder to inspect or clean, be extremely cautious with your movements. Never try to lean off a ladder to reach a further spot. Always move the ladder so that it’s dead on with the place you need to get to.
This may sound like common sense, but when you’ve been at it an hour and you’re nearly done, you’d be amazed how tempting it is to say “Screw it” and just try to get that last little bit. Take it from us—the ER trip and embarrassing story won’t be worth the five minutes you might save.
Look for any signs of wear or damage
Once your gutters are clean, it'll be easier to see if they're in need of repair or replacement.
Look for signs of cracks, splits, paint damage, rust, pooling water, mold, water damage, water marks, or sagging. Any of these could be a sign that the corresponding section (or even the whole gutter system) needs to be replaced.
If you hired someone to clean your gutters, be sure that they check all of the above as well.
Check the flow of water
Using your garden hose, go to the highest point in the gutter and spray a strong stream down the gutter. Have a second person on the ground to watch the nearest downspouts. If your gutters are working as intended, the water should cleanly go from its starting point and out the bottom of the downspout without splashing out or leaking anywhere along the way.
3. Clean your clothes dryer lint trap
Your dryer’s lint trap is basically a filter between your clothes and the exhaust pipe to the outdoors. Keeping the lint trap clean helps keep lint out of your exhaust pipe for longer, meaning you don’t have to worry about vent buildup as often.
Why does it matter? Well, for one, as with any filter, having a lot in the lint trap will make your dryer work harder and shorten its lifespan. It will also make your clothes take longer to dry.
More importantly, lint is highly flammable and combustible, and given its found inside of a heat-based appliance, this isn’t a great combination. If your dryer malfunctions, a little lint from that load may not be a huge deal but a huge backlog in the lint trap could spell trouble.
In general, you should be cleaning out the lint trap with every load of laundry you do. This is especially important for bulky items like blankets, towels, sweatshirts, and anything that you expect to have a lot of hair (such as pet hair).

Locate your lint trap
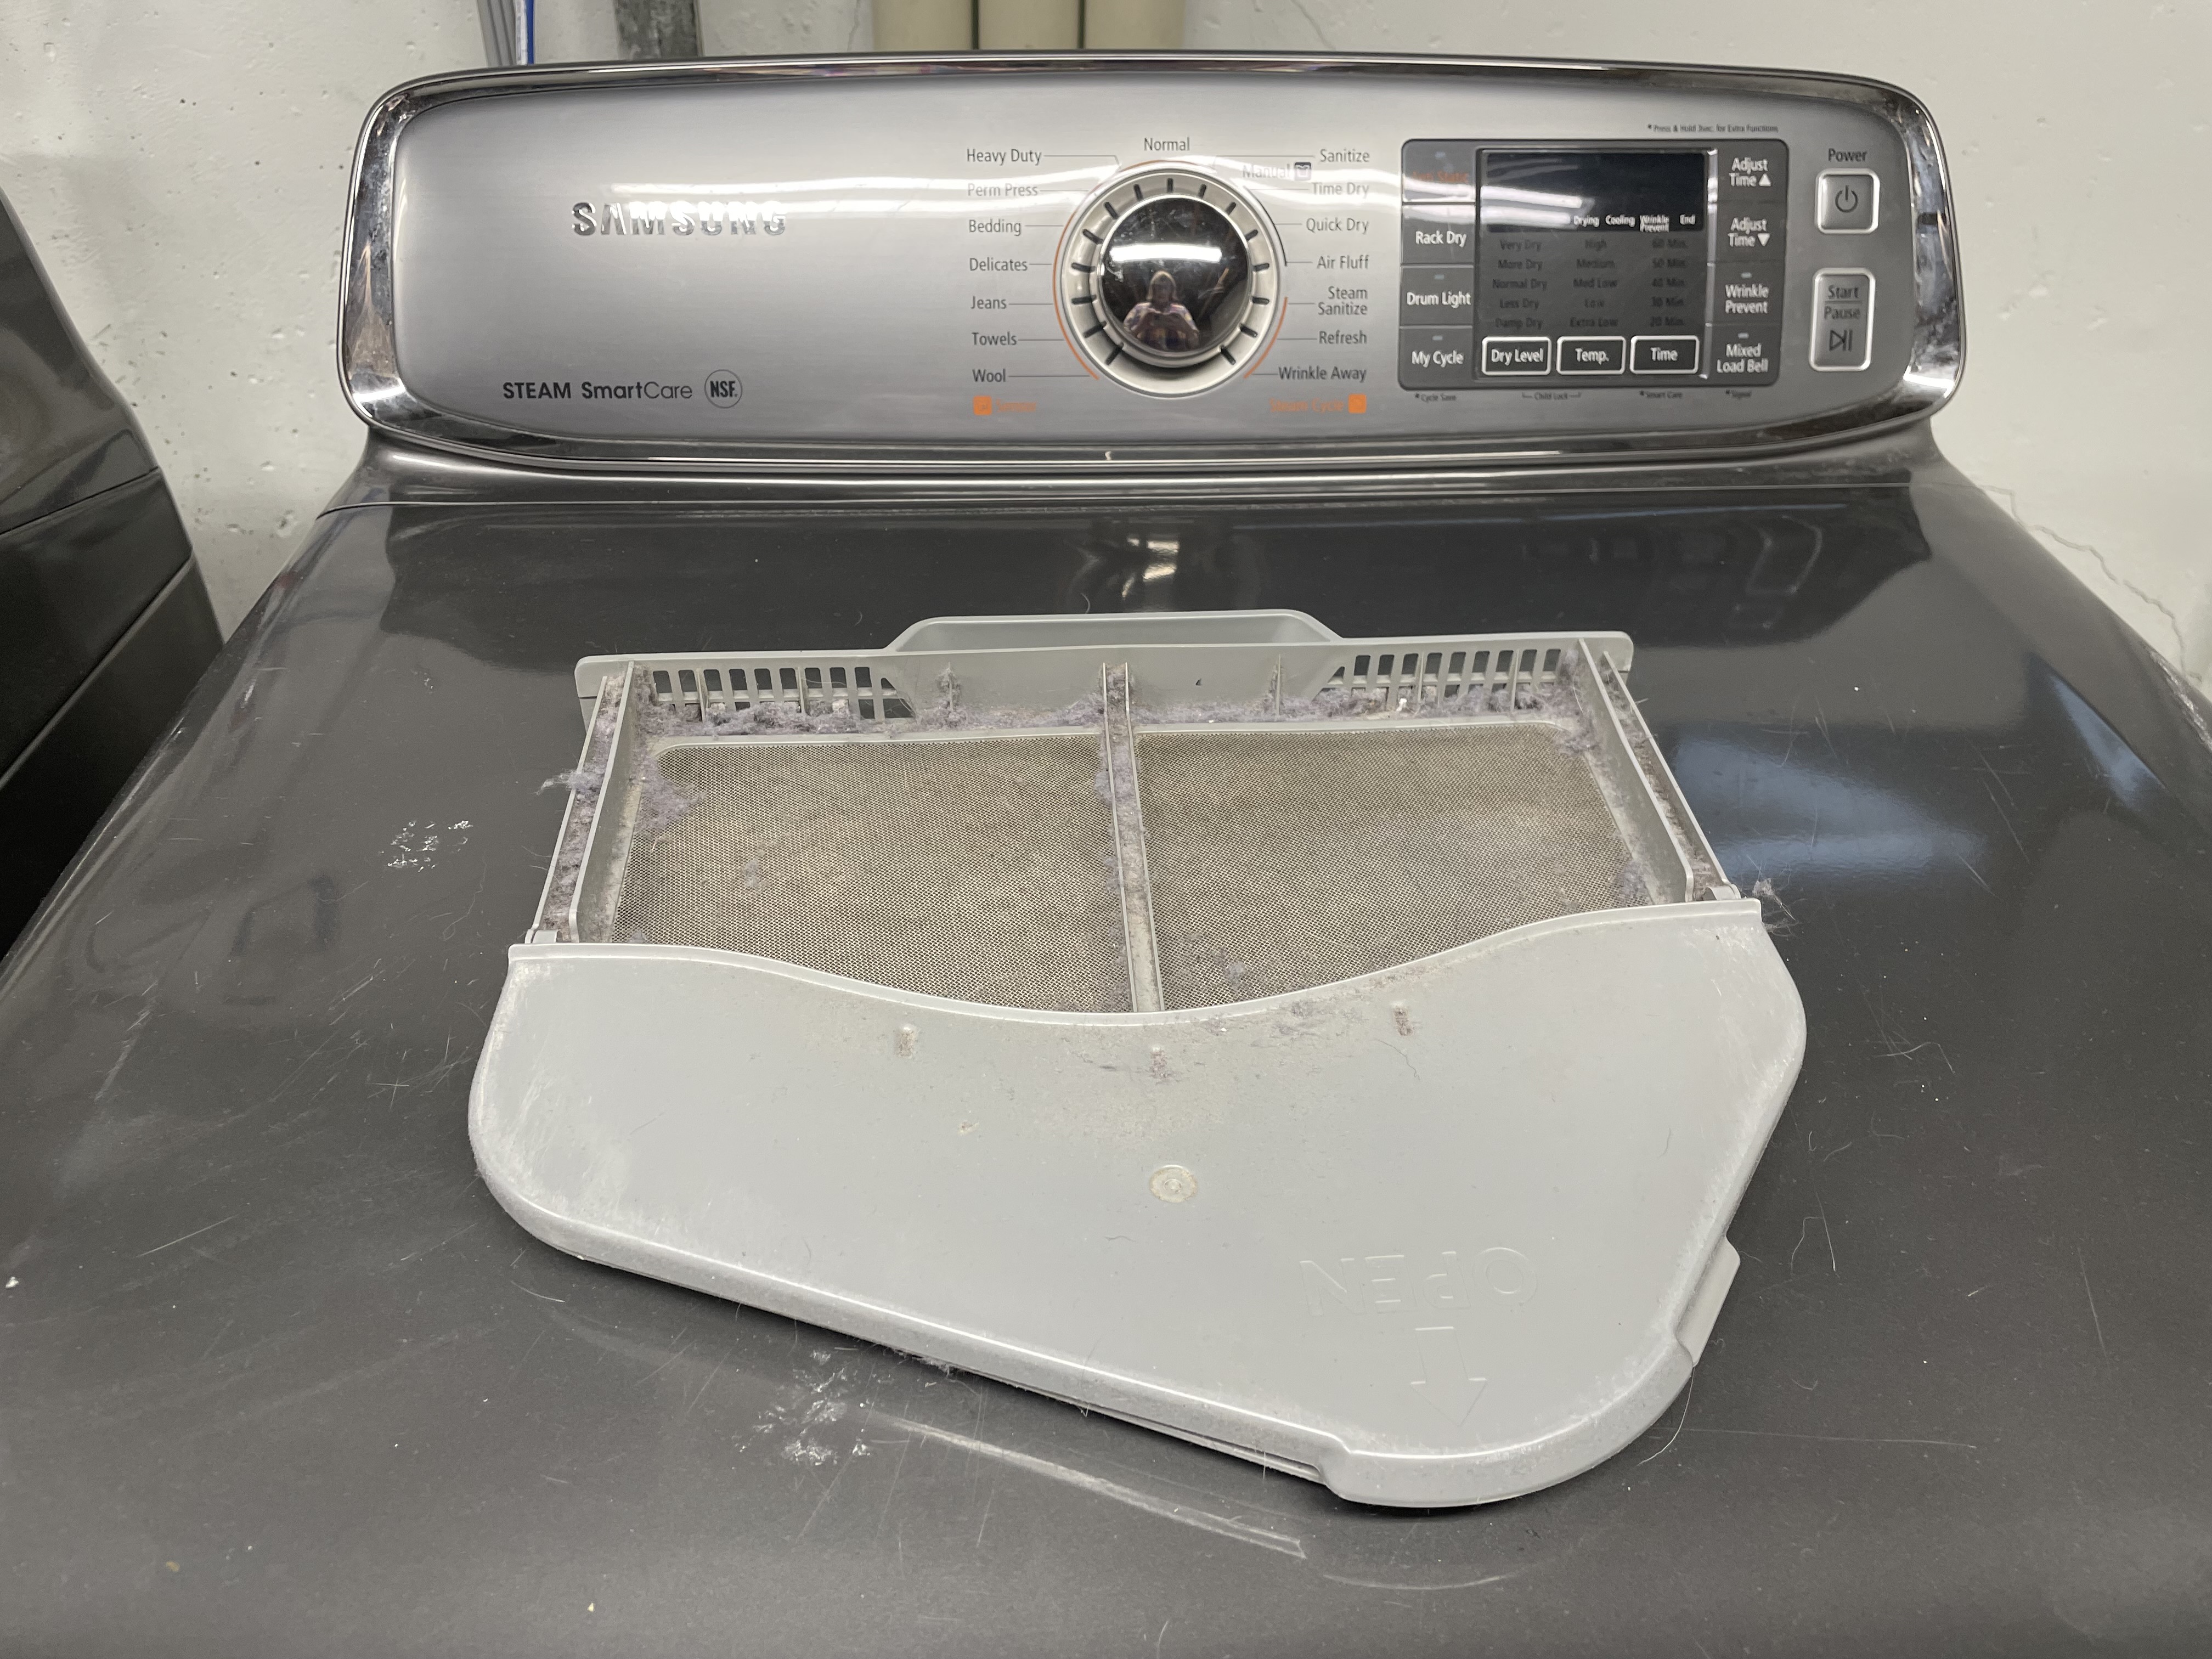
Your lint trap is most likely somewhere that is easily accessible when you add and remove clothing, such as the bottom of the door. You will likely see the removable tray, though possibly only the top or side of the tray.
Remove lint trap
Take out the lint trap. In most cases, the lint traps slide in and out without any sort of securing system that must first be moved. Be careful not to tug too hard, but wiggle the trap a bit to each side if it's feeling stuck too tightly inside.
Remove the lint
Most traps will let you pull the lint out from the tray at this point, though there is often another portion that is able to be opened to make it easier to reach inside all parts of the trap. For instance, in the images above, the trap can be accessed most easily by gently pulling on the solid gray panel until it pops open. It can be closed again with a simple snap.
Return the trap to the dryer
Dispose of any lint you removed (it can go in the regular trash) and return the lint trap to where it came from. It should easily slide in and be flush with the dryer the same way as when you began. If it shows resistance, you may be putting it in upside down. Try to turn it to the other side and see if the fit is better.
4. Get ahead of any encroaching pests
Pests like rodents and bugs can cause damage to walls, furniture, appliances, and can even start fires by chewing through wiring. Bugs like termites can cause massive structural damage, and rodents can carry fleas, ticks, and mites with them into your home. Their feces, urine, saliva, and blood can also transmit disease.
One of the best ways to keep your home clean and in good shape is to make sure you notice and deal with any pest problems before they get out of hand.
Check around the base of the exterior of your home
Look for signs of droppings, unexplained holes, and chew marks or damage. Check along the roof, especially in places like eaves or rafters where there is more space, around windows and doors, around the foundation, and around any exterior vents. Within wood areas, such as decks and porches, look for small holes or unusual textures, as these can be signs of termites as well as other insects trying to invade. Any of these can be signs that a bug or rodent is trying to make your home its own.
Be sure to also check any existing holes, such as those made by pets, as they can look like an appealing place for a pest to set up shop if given the opportunity.
Check the interior of your home
Inspect every room of your house while looking for the same signs as above as well as any unexplained damage to furniture, appliances, or wiring.
Pay especially close attention to outside walls, less used areas of the home, more cluttered areas, kitchens, basements, attics, storage rooms, and bedrooms.
Look inside, under, and behind kitchen cabinets. Check in corners of closets, around fireplaces, around windows and doors, behind appliances, around pipes and washing machines, near vents, around floor drains, and along the areas where walls meet floors.
Basically, if there is food easily available or if there are quiet places where a pest could live undisturbed, those are the places you’re most likely to find activity.
Keep an eye out for droppings (which can look like black specks when they’re from bugs) as well as dead bugs, and shed skin or wings. Every house is likely to have a dead bug or two in it somewhere, so don’t panic if you find out. However, if you find large groups or a noticeable pattern of activity, that’s where you’ll want to focus your attention.
Fill any identified holes
Use caulking or spray foam (available at any hardware store) to fill any holes that you find. Including steel wool can help discourage rodents from chewing through the caulking, while tougher substances like steel mesh or cement should be used for larger holes or especially stubborn critters.
Basically, your goal is to stop any easy entry into your home no matter how large or small a pest might be.
Ensure you’re discouraging rodents from moving in
Check for any easily-accessible food or garbage inside your home. Avoid cluttered areas, especially large stacks of paper or newspaper or an abundance of cardboard boxes for long periods.
Outside, keep any cooking areas clean and keep wood piles, composting bins, and bird feeders away from the home. Ensure that any plants within 100 feet of your home are kept trimmed and not overgrown.
5. Keep trees trimmed and remove dead areas
Regular tree maintenance is the best way to avoid damage from fallen limbs (or worse, trees), to limit your fire risk, and to keep your trees growing strong. It means your electricity and internet are less likely to go out unexpectedly, too, if your lines are above ground.
Ideally, you should do a quick check on your trees before and after any major storm, during droughts, and during extreme temperature fluctuations. The sooner you can identify an issue, the less likely it is to turn from a small concern to a big problem. At minimum, you should try to do this sort of check once per season.
Check for hanging or fallen limbs
Sometimes it's obvious when your tree is having issues because you'll find a big ol' limb lying across your yard. However, ideally, you want to catch signs that a limb is fragile before it has the chance to fall. Otherwise, you risk damage to your roof, car, fence, or even your whole home.
Take a look at each of your trees from the ground. Look for any branches that seem to be leaning at an unusual angle, have dead leaves (while other branches are green), or are visibly not attached securely at the base.
If you see a lot of potential limbs that need attention or any suspicious dead-looking areas, it's probably best to call in a tree company to take a look and give an estimate on what they think needs to be done.
However, if it's just a single lower (and smaller) branch, you can always hop on a ladder and bring it down yourself. Just be sure to have someone spotting you at all times, and if it's in question whether you can remove the branch safely, leave it to the professionals.
Look for any trees too near power lines
Trees that are too close to power lines can cause power outages during storms and pose a fire risk if any lines spark. Because of this, electric companies often keep an eye on the trees that impact their service areas. Tree limbs that are over or growing too close to power lines are likely to get chopped off eventually by your electric company.
While you can certainly wait for this and let them foot the bill, the cuts are often practical but not pretty, and they're done to protect the wires rather than the tree. If you’re attached to how your tree looks and invested in making sure it continues growing for a good long while, you may want to hire a professional before the electric company has to get involved.
You're better off keeping your trees pruned where you can so that they naturally grow away from power lines whenever possible. By discouraging branches that try to grow toward power lines, roofs, etc, you can help guide the tree to a safer shape long term.
Remove fallen branches and sticks
After a storm (or if it's just been a while since you've done tree maintenance), there might be a fair number of sticks and branches to deal with. It's best to keep your yard free of these when possible, as this debris can become a fire hazard as the sticks dry out.
If you live in a wildfire-prone area, it's especially important to keep your yard free of branches and to store any piles of sticks or firewood away from any buildings.
To dispose of fallen branches and sticks, you should consult your trash company’s policy on yard waste. They may have specific regulations around sticks and limbs, in fact. For especially large limbs, you can also have a tree company come to remove them while doing trimming.
In some areas, you can burn the tree limbs in a fire pit or bonfire, but be sure to check burn recommendations for the day and local regulations around open flames. Your weather app will often tell you if it’s a high burn risk day, usually meaning there has been little rain and/or it’s windy so fire could easily spread. Never start a burn beside a structure (especially your home), and keep a fire extinguisher handy just in case.
Never put gasoline on a bonfire or fire pit to make it burn faster or to start the fire. Gasoline can travel from small drops and through vapors in the air, and when pouring it’s easy to get on your skin and clothes. Don’t be like the guy I know who got severely burned doing so at a bonfire.
Check for dead trees
It can be hard to tell if a tree is dead in the fall and winter, as most go dormant and lose their leaves. However, if you reach summer and fall and find that your tree hasn't gained any leaves or has only dead leaves, it's a pretty good sign that the tree has reached the end.
It's best to deal with a dead or dying tree sooner rather than later to avoid any risk of it falling and harming your home or, even worse, a person in the wrong place at the wrong time. Dead trees will rot, dry out, and hollow out, leading to weaker structures that are more likely to fall during a storm or catch fire easily.
Check for limbs hanging over the home
Ideally, you want to avoid any large branches dangling over your roof, as even the healthiest tree can lose a branch during a storm.
It's especially important to make sure that there are no branches near chimneys, as the dripping water from leaves can lead to water damage around the chimney, and the branches can pose fire risks for any sparks that come out of the chimney.
Consider a tree inspection
While not essential, getting an inspection and quote from a tree company can be a great way to make sure your trees are in good health. Always get multiple quotes before hiring a new company, especially if the first quote feels particularly high. If it’s your first time choosing a tree company to work with, look for those who answer questions thoroughly, are responsive to messages, and have any required insurance for your state.
Even if your state doesn’t have insurance requirements, make sure that either you or they have some form of liability or umbrella insurance that will cover any accidents that could occur on your property.
If you have delayed tree maintenance, there may be quite a bit to trim, but it's cheaper to deal with those all at once for the same tree than to spread out the cost. (Much of the cost is the time and safety equipment needed to get high in the tree, so the actual cutting is minimal by comparison.)
These companies can also advise you on anything to watch out for, such as older trees at risk of falling on your home or trees that seem close to the end of their life.